How to use Darning loom
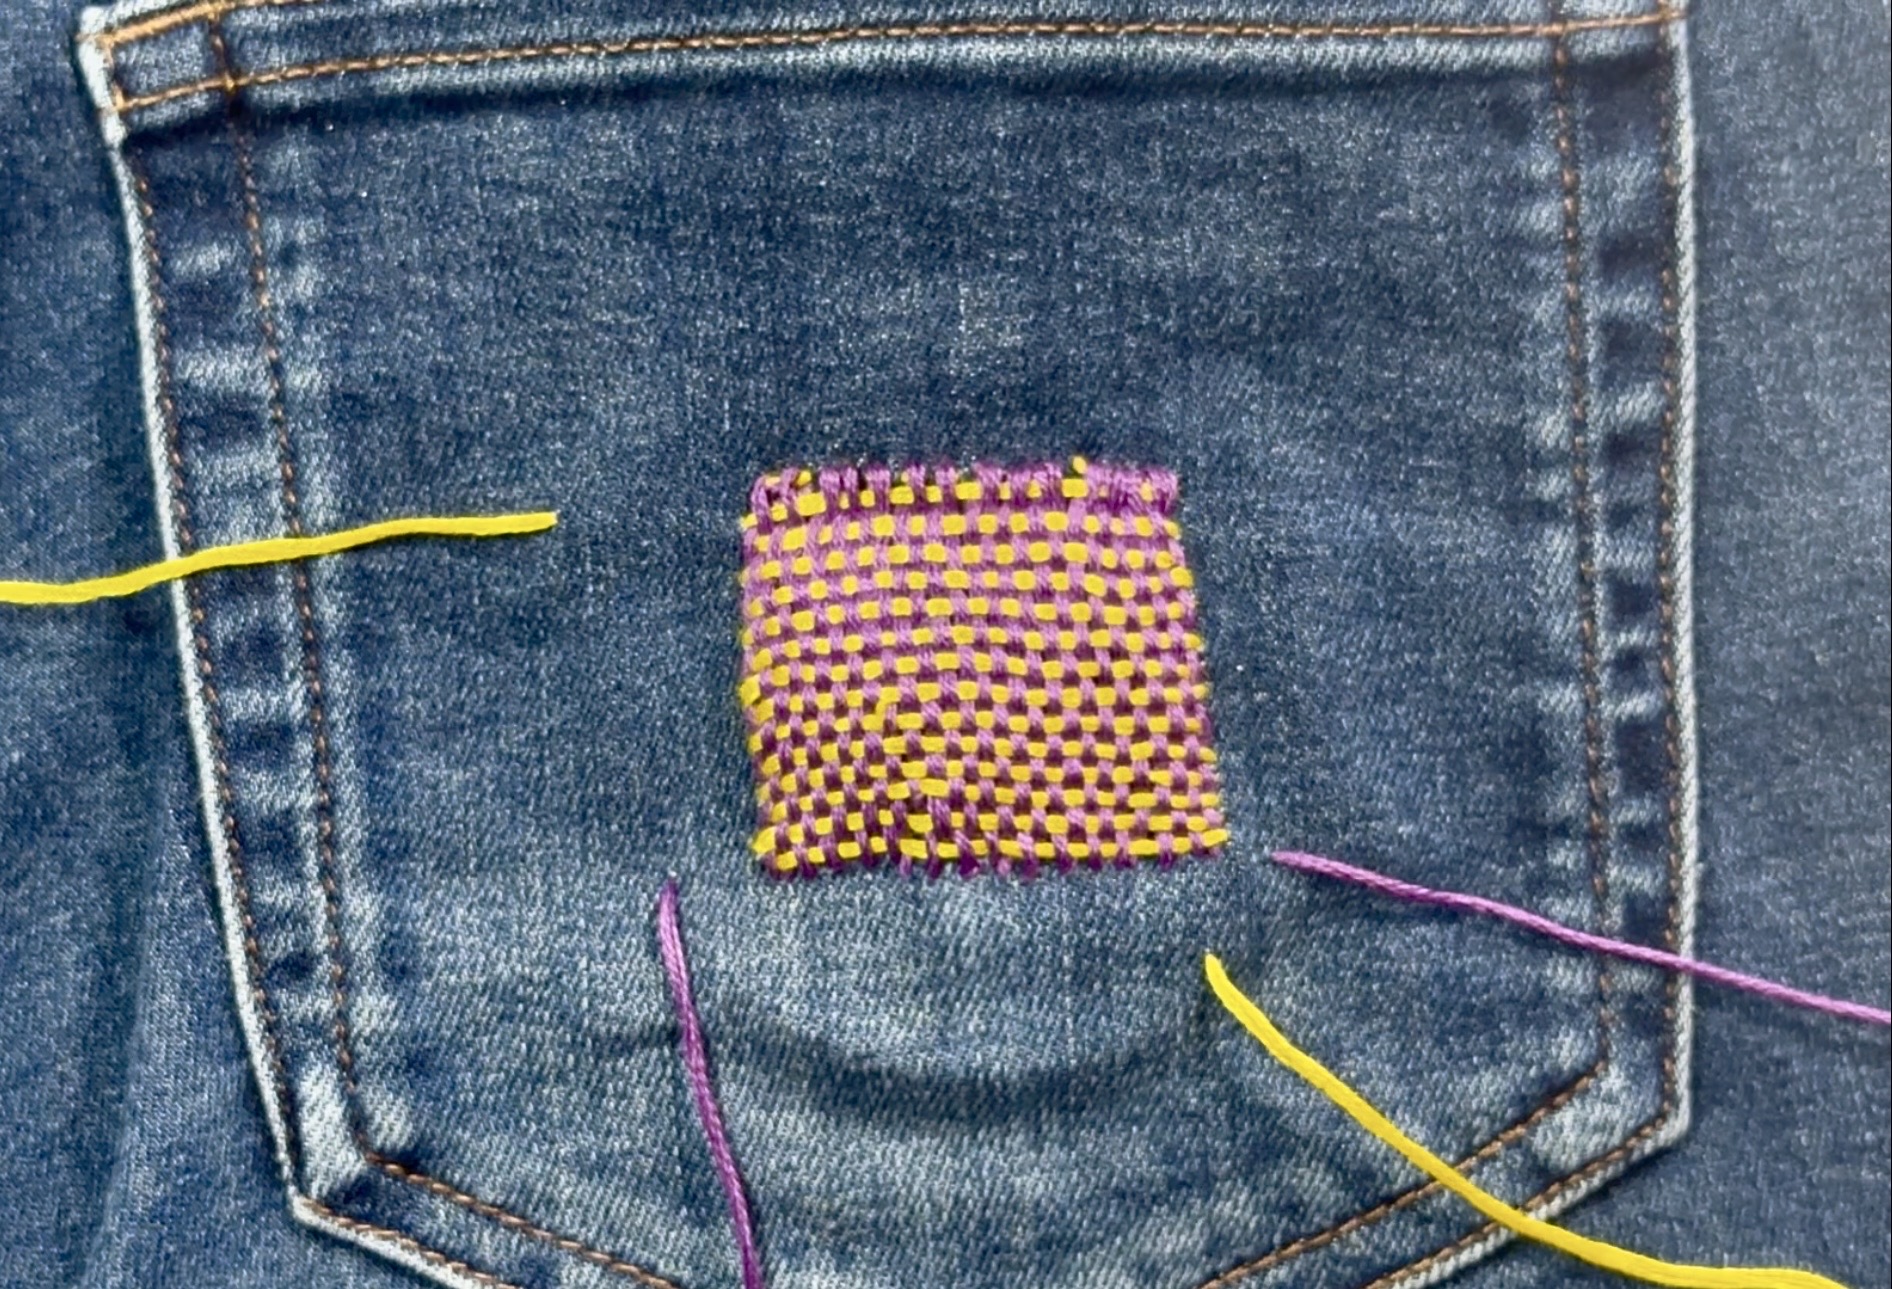
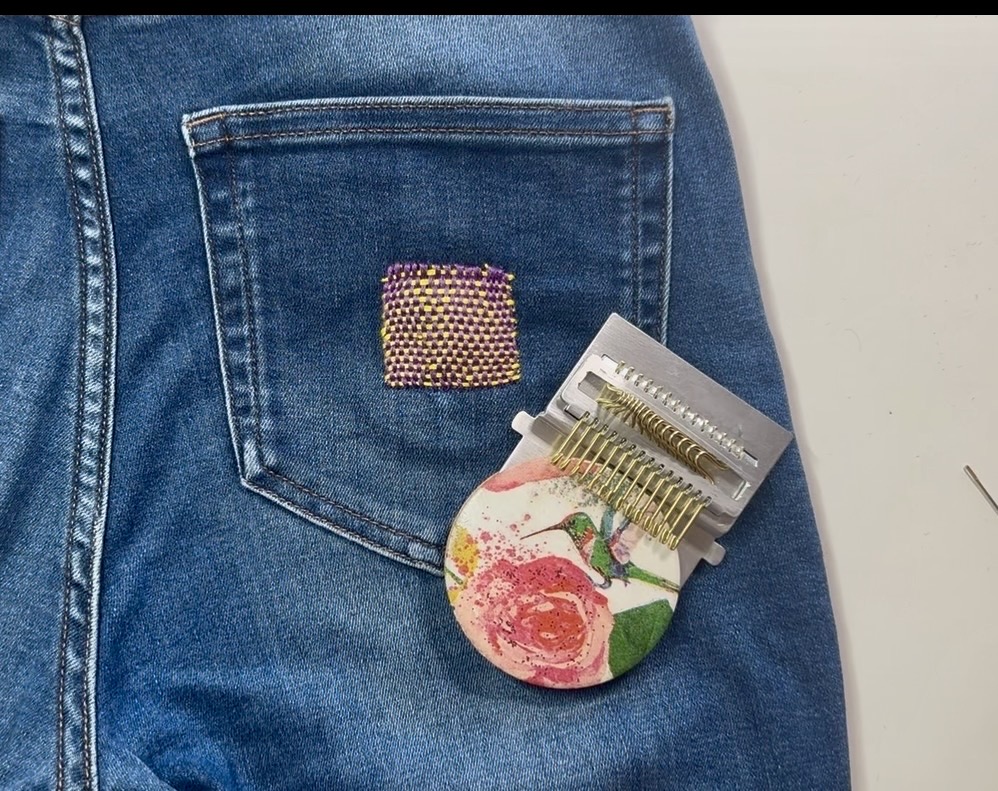
Repair & Customize with Speedweve : This tool allows you to not only quickly and neatly repairclothing but also to decorate it by creating beautiful and original patches with various patterns, following the principles of Visible Mending.
Kit Contents
You will need:
• 1. Wooden Disc.
• 2. Metal Speedweve loom with hooks (the loom itself).
• 3. Elastic Bands (2 pcs) for securing.
• 4. Darning Needle and darning thread.
Step 1: Setting up the Base
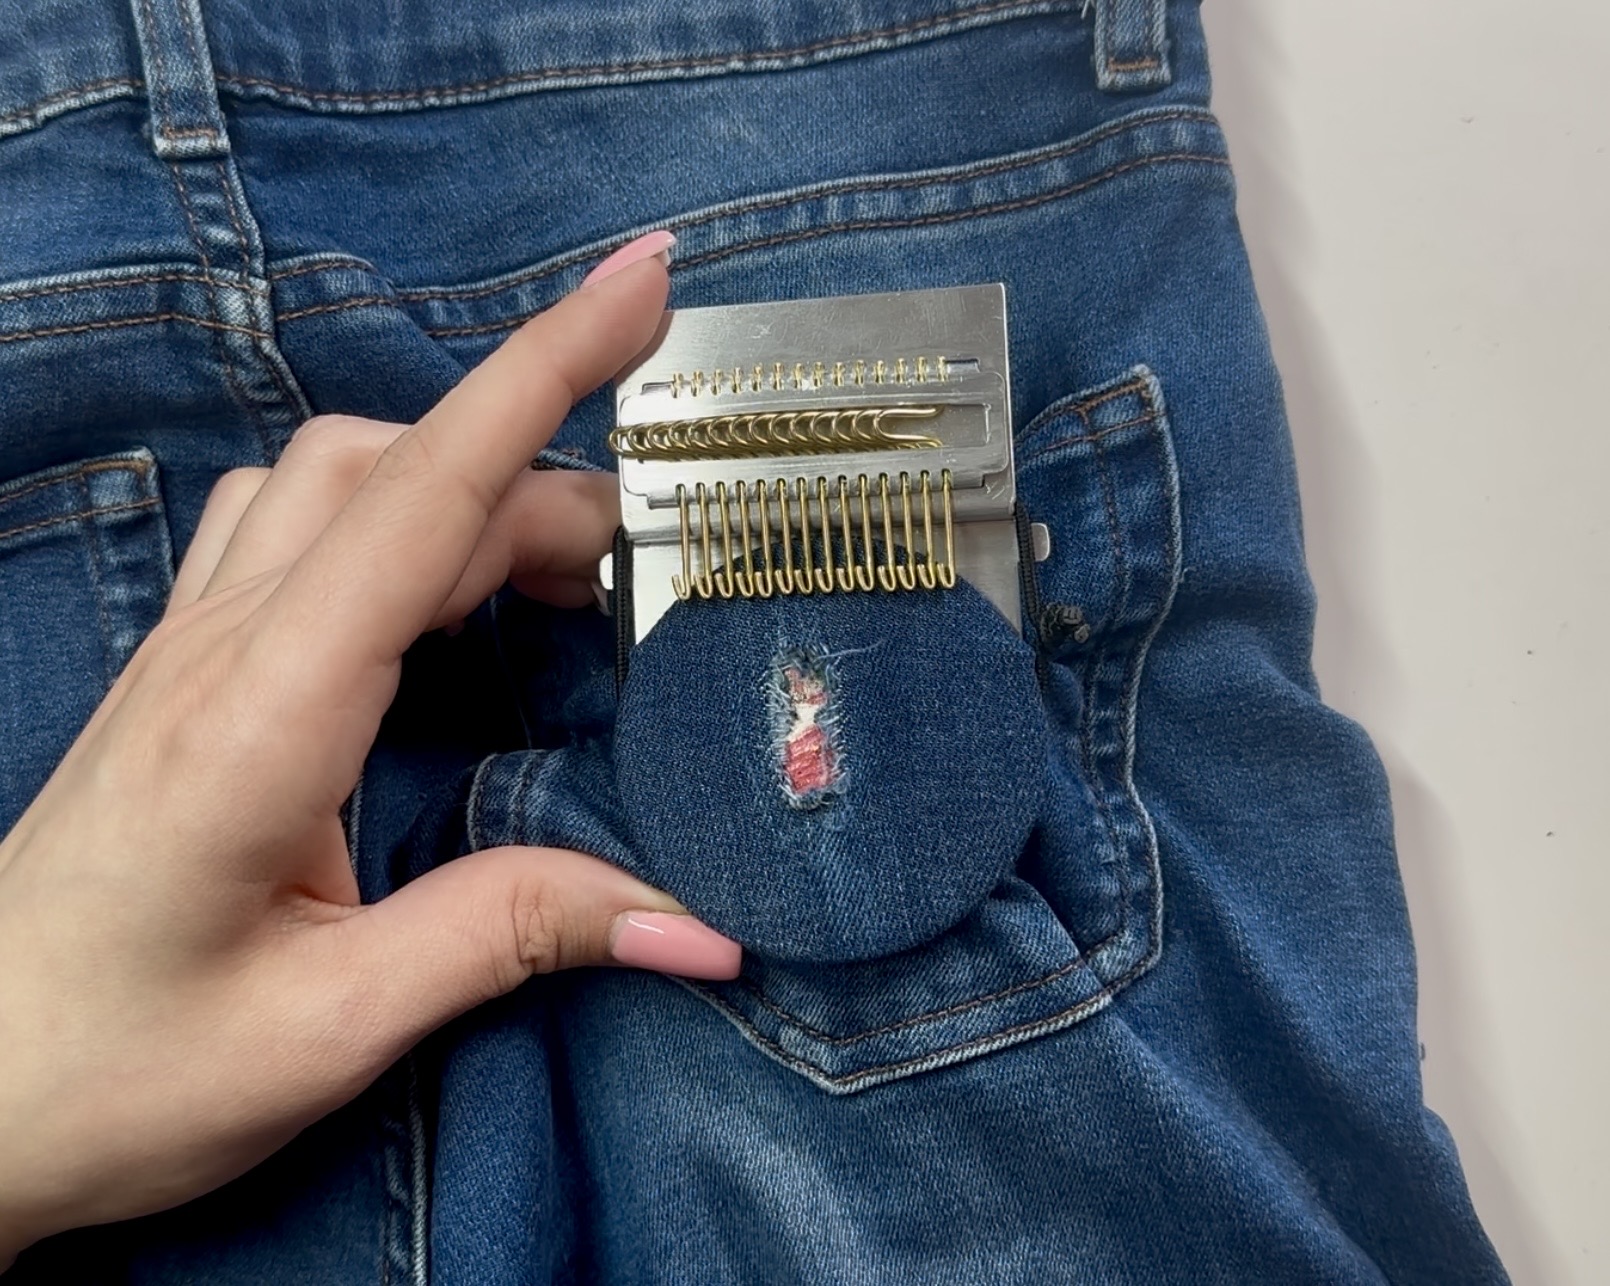
1. Position the Hole: Place the Wooden Disc (1) underneath the damaged area of the fabric so that the hole is centered (or choose a spot for a decorative patch).
2. Secure the Fabric: Fix the fabric onto the Wooden Disc using the first Elastic Band (3). The band should press the fabric tightly against the base.
3. Attach the Loom: Insert the Metal Speedweve loom with hooks (2) into the grooves of the Wooden Disc.
4. Final Fixation: Secure the Metal Speedweve loom with hooks with the second Elastic Band (3).

Step 2: Threading the Warp (Vertical Threads)
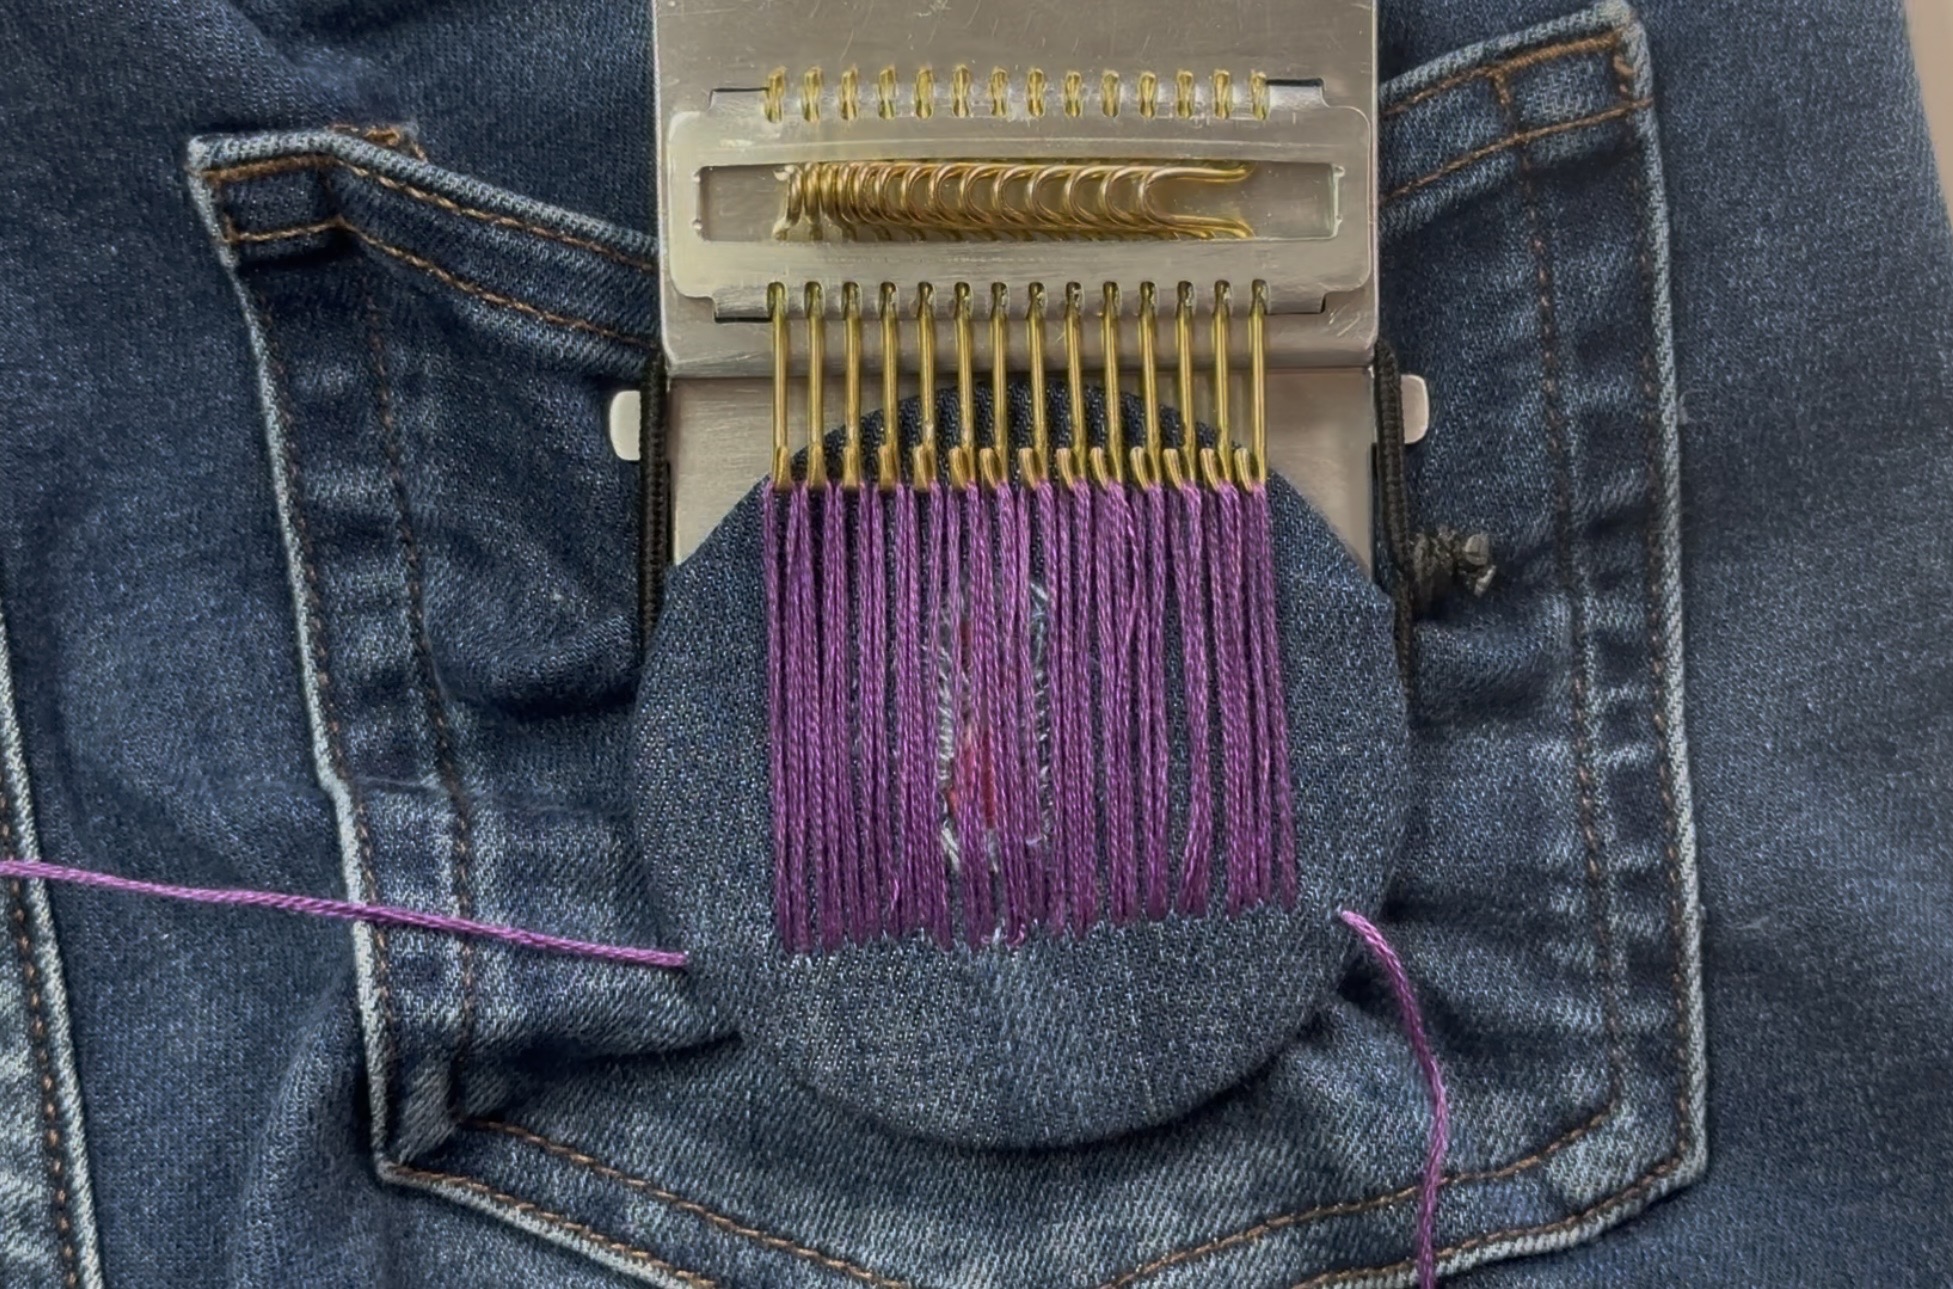
This creates the first, vertical foundation for the future patch.
1. Secure the Thread: Anchor the working thread onto the undamaged fabric below the hole.
2. Draw Up: Bring the thread up and loop it over one of the hooks on the Speedweve loom.
3. Return: Bring the thread back down to the fabric below the hole and anchor it again.
4. Repeat: Repeat this motion, drawing threads from the hook back to the fabric. The threads must be pulled taut.
4. NOTE: You may use all the hooks for a wide patch or only the necessary section of hooks to cover the hole with a small allowance.
Step 3: The Weaving Process (Horizontal Threads)
A. First Row
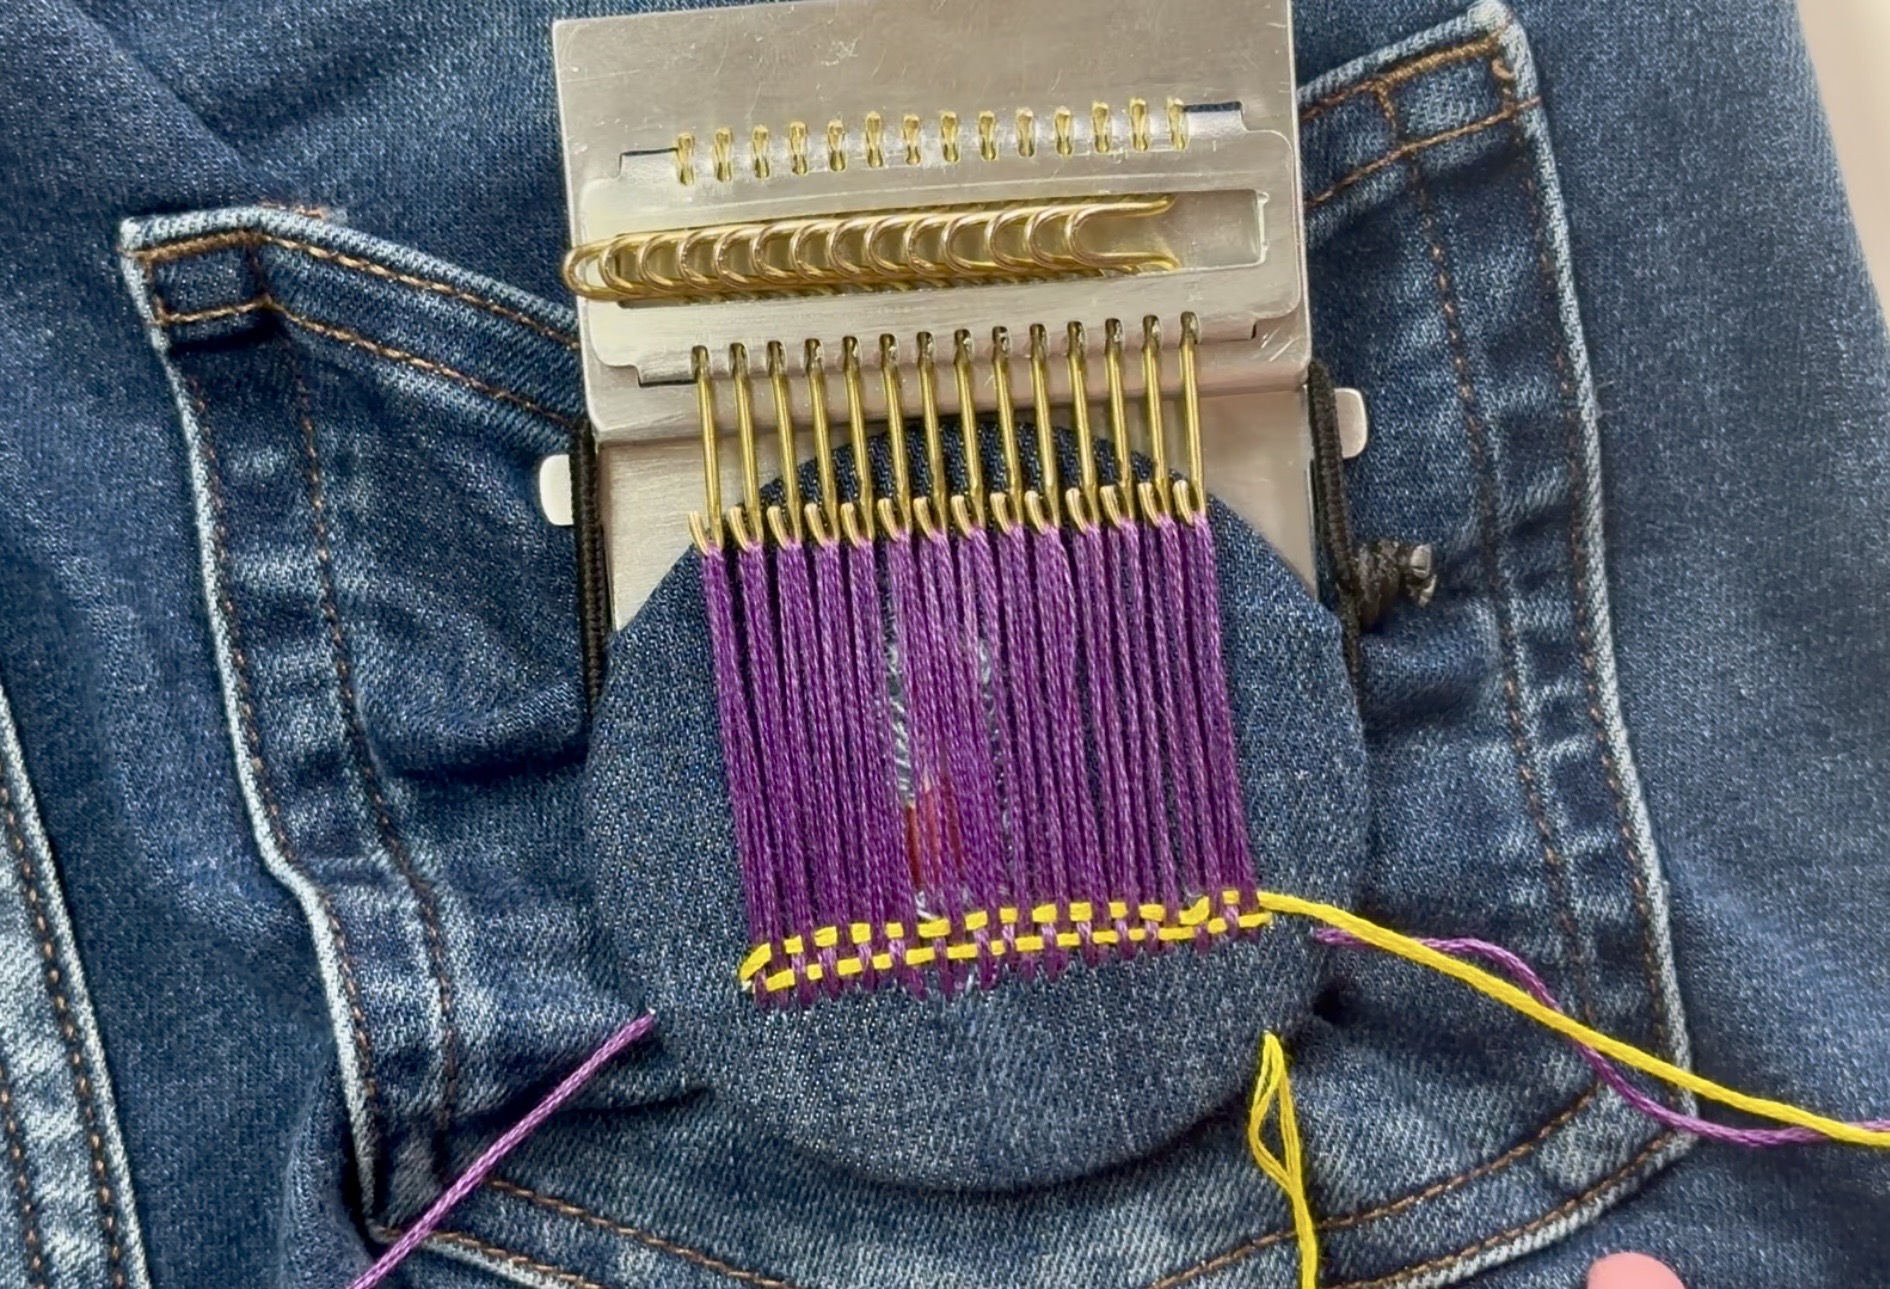
1. Needle Pass: Take your darning needle and thread. Pass the needle between the taut warp threads (over one, under the next), creating the first row.
2. Tamping Down: Push the woven row down toward the base of the patch. Anchor the thread onto the intact fabric along the edge.
B. Subsequent Rows (Changing the "Shed")
1. Changing Thread Position (KEY STEP): Before starting the next row, turn the hooks on the Speedweve loom.
• Crucial: This action will cause half of the taut warp threads to rise and the other half to fall, creating a "shed" (opening) for the needle.
2. Needle Pass: Pass the needle back through this new "shed" in a single movement.
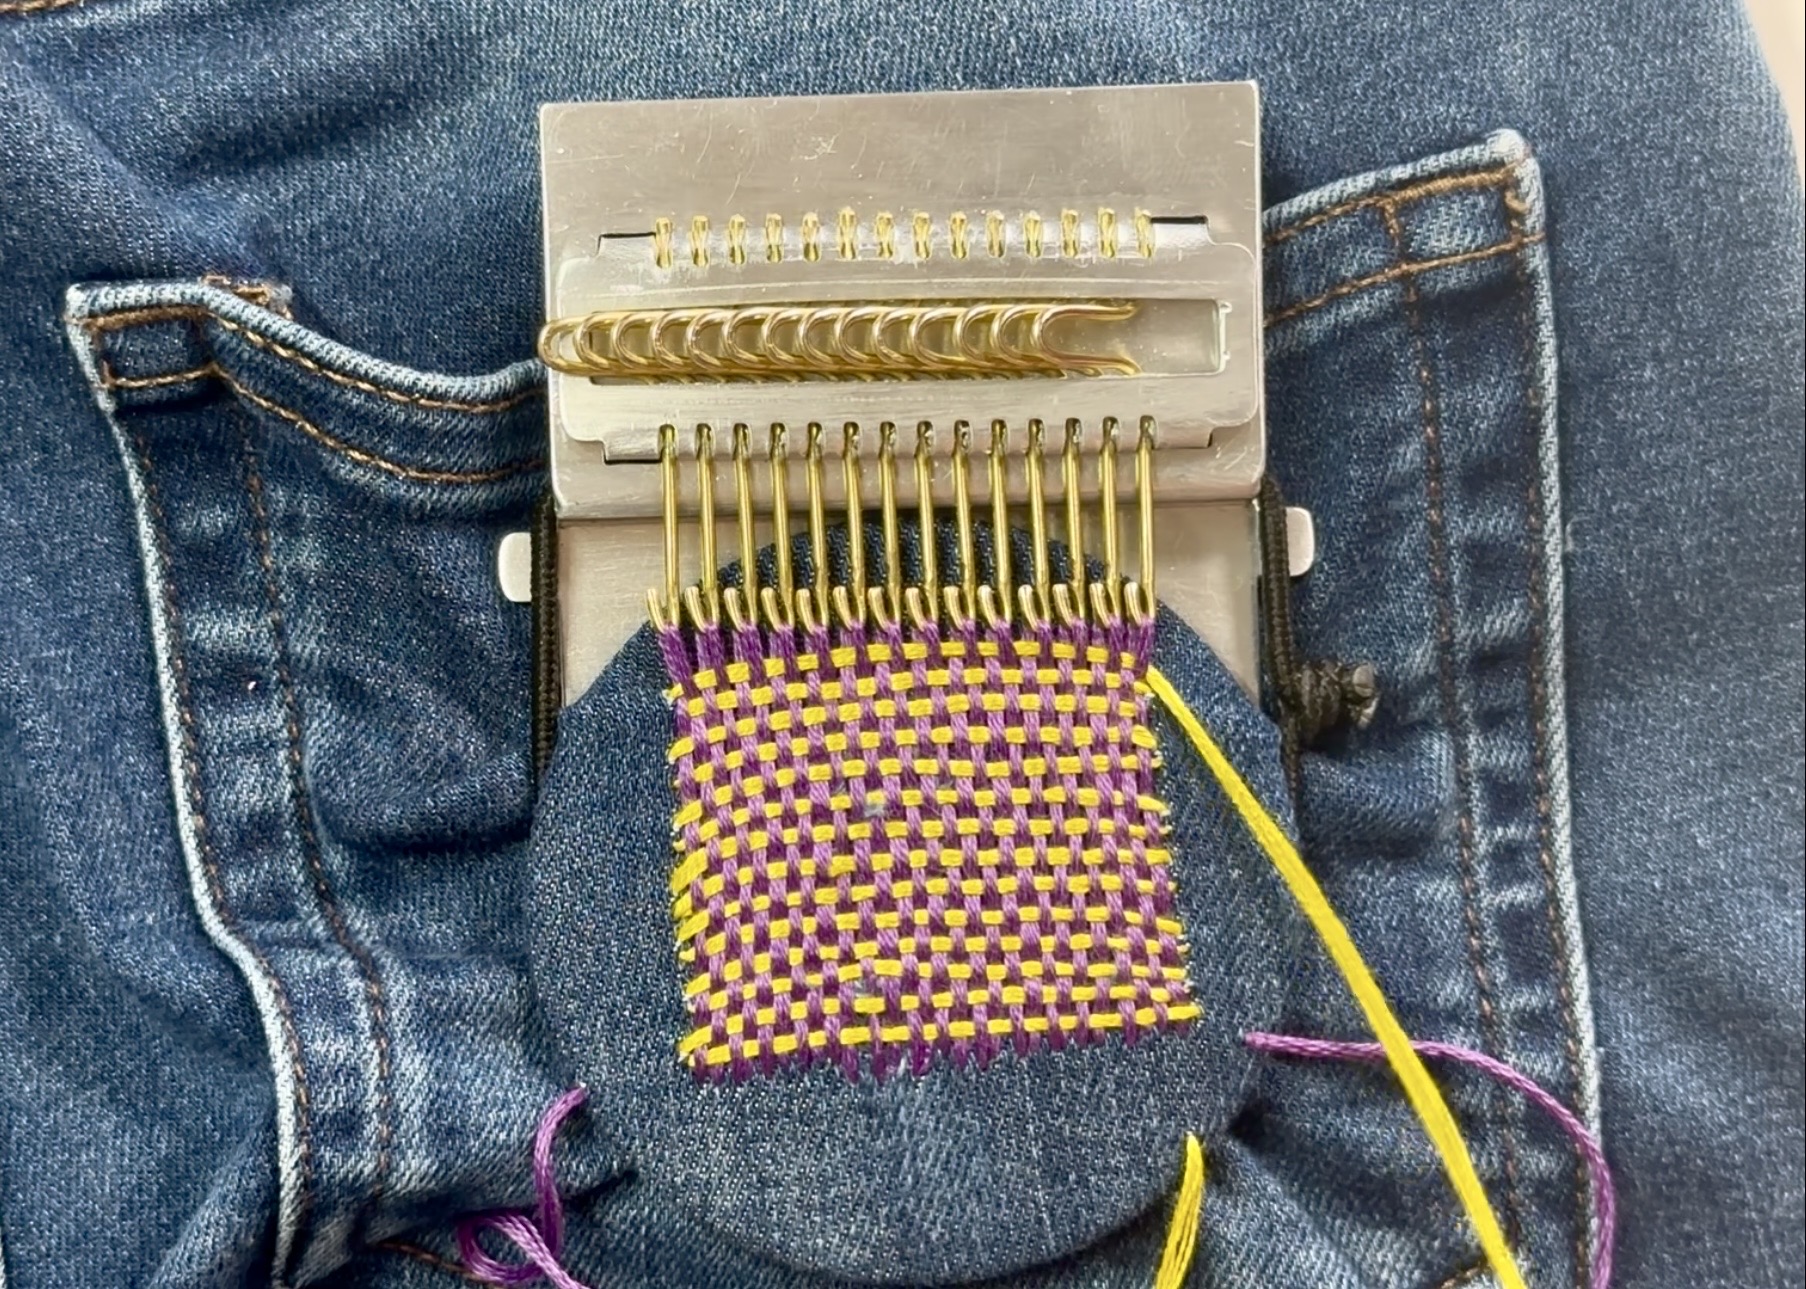
3. Repeat: Before every new pass (left to right and back again), always turn the hooks. Lay the horizontal threads densely until the patch is completely finished.
✅
Step 4: Finishing the Work
1. Remove the Loom: Remove both elastic bands. Carefully detach the Metal Speedweve loom with hooks from the Wooden Disc.
• Attention: When detached, the warp threads will slide off the hooks, forming loose loops.
2. Secure the Loops: Small loose loops, formed by the warp threads, will remain at the edge of the darning. Use the needle to carefully anchor these loops into the fabric to prevent unraveling.
3. Final Touches: Trim any excess threads.